An Introduction to Javascript (Part 2)
.webp)
However, if you aren’t at that phase yet, continue reading. We’ll recommend some handy resources where you can learn all there is to JavaScript.
To read the first part of this tutorial, go here: Introduction to Javascript (Part I)
JavaScript Scripting on the web
First, we’ll start by opening a new tab.
Then we’ll write about: blank on the address bar (the URL part) and hit enter. This will help us get to a blank page with no text content and will look white.
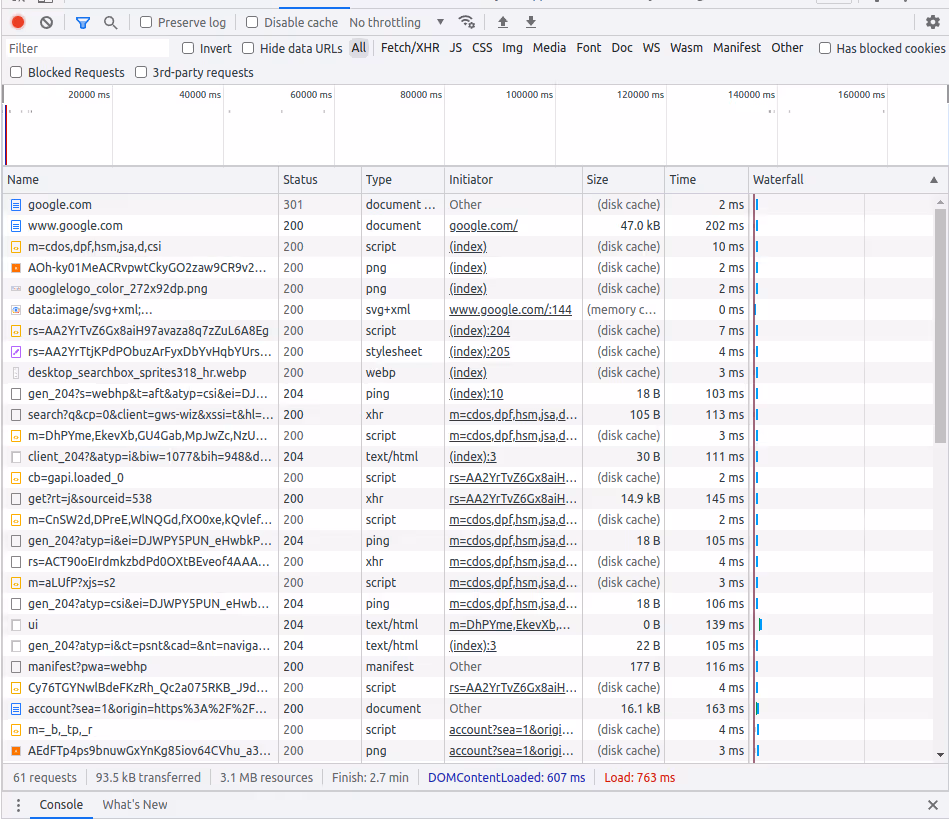
After arriving at this page, we must execute Ctrl + Shift + J. This will open the developer tools on the web. Go to the console tab.
This will be our testing ground for console-executed JavaScript, where we’ll have a direct approach to solving simple problems with JavaScript (think of introductory algebra, basic data calculations, and more).
This console contains several tabs, which you’ll want to dive deeper into:
Console Tab
Here you can execute your JavaScript code and refer to the active page context, including the DOM elements and several other variables on the browser’s page.
Elements Tab
In the elements tab, you can look at the website's current data. This data comes from the DOM, and the elements can show you different metadata for them, like the styles applied to the particular element.
You can explore the several sub-tabs (Computed, Layout, Event Listeners, for example) to get a broader view of the specific element.
Sources Tab
The sources tab lets you see the different elements loaded (remember, a website is a group of other elements loaded and patched together with HTML, CSS, and JavaScript) to conform to your current webpage.
It also works to set debugging breakpoints to the JavaScript files.
Network Tab
The Network Tab is one of the tools available in the Developer Options, and it provides information and options related to network performance and connectivity.
It also provides the ability to troubleshoot, emulate and view, in different sections of time, what the content of each payload contains and more.
This is especially useful for determining the nature of HTTP calls (calls made to the servers to get information).
Making it click
Now, enough of the chit-chat. Let’s jump into a practical example of JavaScript DOM manipulation that will get you started on the right track.
- Open a new blank tab (open a new account, and write on top of it “about blank”).
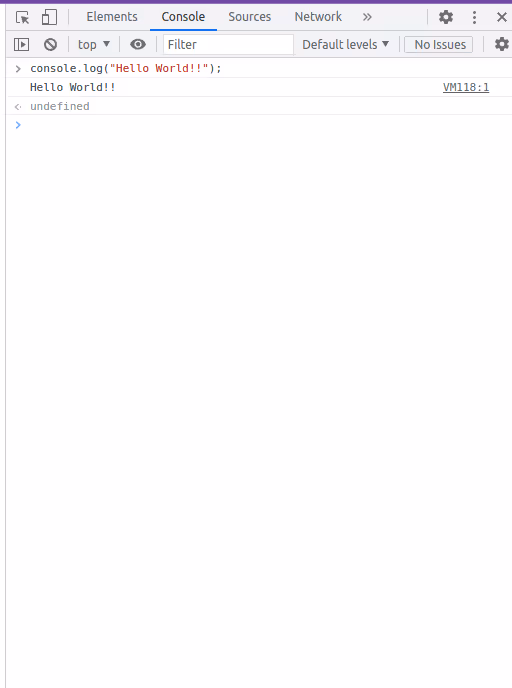
- Open the console tab. Write the following code:
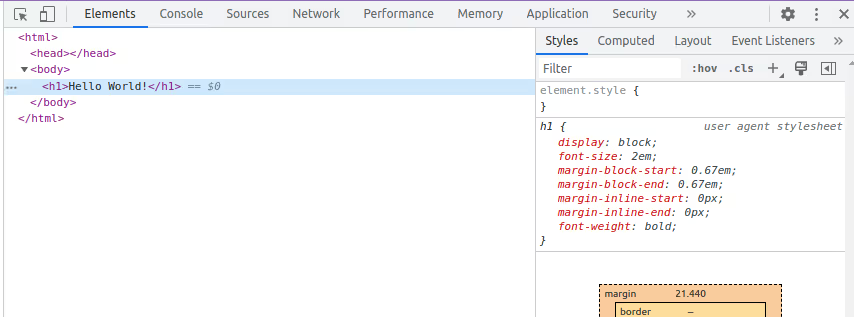
document.write("<h1>Hello World!</h1>")
This will prompt the following result:

And most importantly, it will write your first real DOM manipulation.

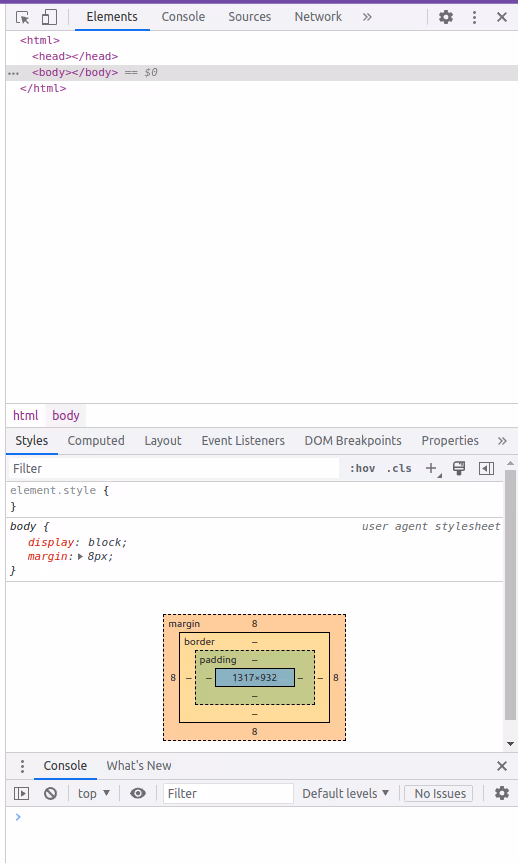
3. Go to the Elements tab, expand the body, and look for yourself. The page's structure will have changed, and you can now select the H1 element inside the body element.
4. Now, go back to the console tab, and write the following: document.querySelector("h1").innerHTML = document.querySelector("h1").innerText + " - The current date is " + new Date().toISOString()
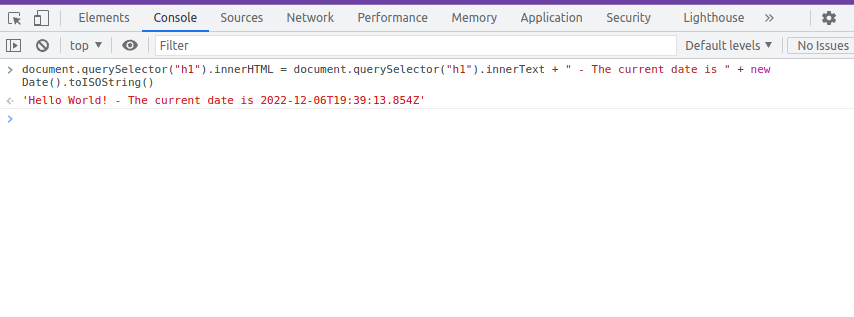
You have now changed the text for the H1 element you selected. We can update DOM elements, check the content afterward, and write your results here.
The power of Node.js
You can follow this part with either a local development environment or one set-up at Stack Blitz.
To install Node.js on a Windows machine, follow these steps:
- Download the latest version of Node.js from the official website at https://nodejs.org/. The download page will automatically recommend the newest version of Node.js that is appropriate for your system.
- Run the downloaded Node.js installer. This will launch the Node.js setup wizard, guiding you through installation.
- Follow the on-screen instructions to complete the installation. This will typically involve accepting the license agreement, choosing the installation location, and selecting any optional features you want to include.
- Once the installation is complete, click the "Finish" button to exit the setup wizard.
- Open a new command prompt window and type "node -v" to verify that Node.js was installed successfully. This should print the version number of Node.js installed on your system.
After completing these steps, Node.js should be installed on your Windows machine and ready to use. You can use the "node" command to run JavaScript code and the npm package manager to install additional packages and libraries.
In order to install NodeJS on your Linux machine, it’s preferable to install NVM, which stands for Node Version Manager, and will assist you with installing and using different NodeJS versions and packages.
You can follow the installation instructions here, and it will undoubtedly be more efficient and practical than just following the basic version installation instructions.
Now, to explain the power of NodeJS, let’s proceed with a simple example.
For starters, let’s go to GitHub and create an account.
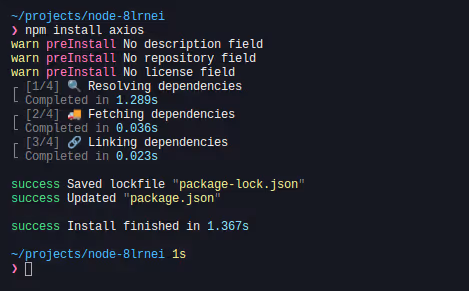
Once you set up an account, go to Stackblitz and sign in with your GitHub account. Go to the main page (https://stackblitz.com ) and choose NodeJS.
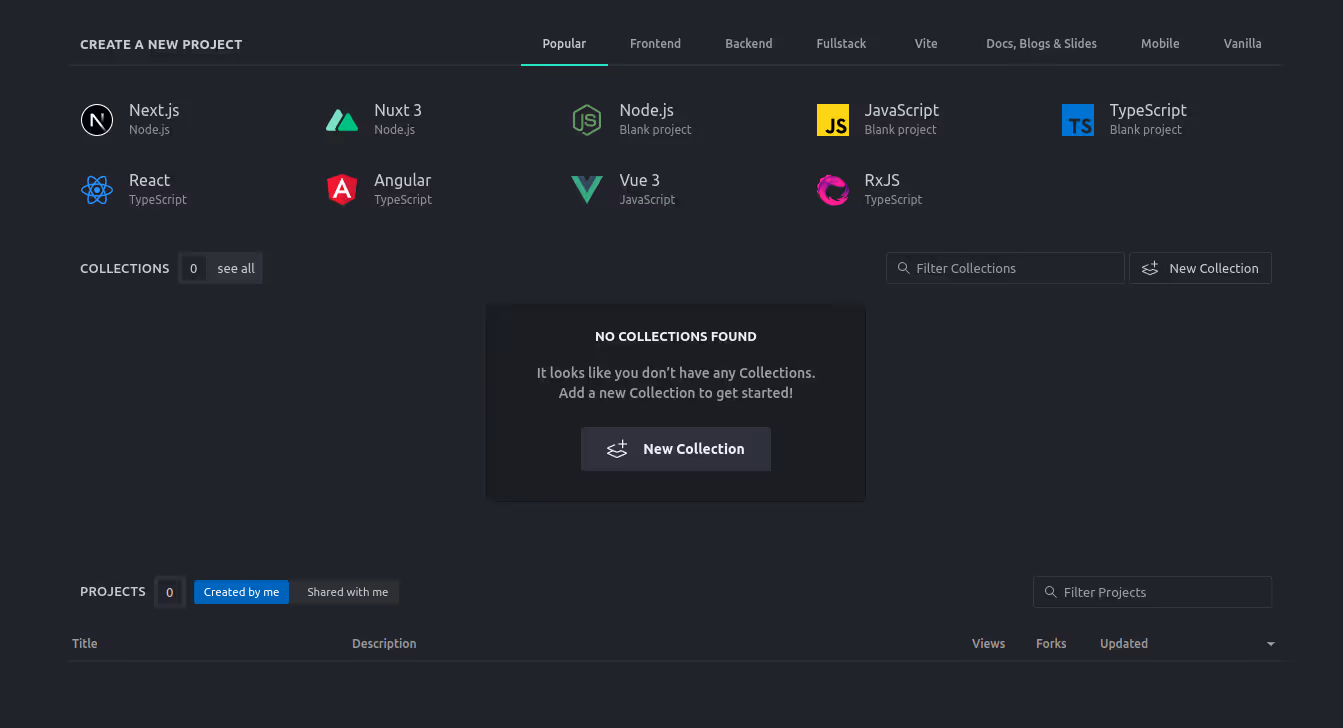
This should bring you to your first NodeJS project:
Go to your terminal, and type “npm install Axios.”
After this, just go ahead and copy the following code on the editor:
const Axios = require('axios');
const fetch emails = async (URL) => {
const regex = /([a-zA-Z0-9._-]+@[a-zA-Z0-9._-]+\.[a-zA-Z0-9._-]+)/gi;
try {
const response = await axios.get(URL);
const text = JSON.stringify(response.data);
const emails = text.match(regex);
console.log(emails);
} catch (error) {
console.error(error);
}
};
// Example: Fetch all the emails from the Github raw file
fetchEmails('https://raw.githubusercontent.com/ustato/confdir/bdfe106e1b5d477e839d927ba62420a4c976cca1/.atom/.apm/registry.npmjs.org/atom-select-list/.cache.json');
After you’ve copied and pasted the code in the editor file index.js, run the following on the console:
node ./index.js

After making a GET, this will get you a list of emails from this particular URL address.
The following will be an explanation of this code:

This line will import the package axios, so we can use this package’s functionality to get the data we’re fetching from the internet.

Here we define the function that will fetch the data based on the URL provided. The async function will specify that this function is an async that allows this function to be dealt with as a promise and handled more orderly manner.

Here we define a Regular Expression that will allow us to match the emails from the information string we’ll be getting.
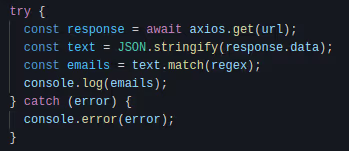
And here, we try to get the data using Axios and parsing the emails using the .match function against the stringified JSON found (it receives the information as a JSON, so we need to convert it to a string data) and then just print it.
Resources: Where to learn JS for free
This has been an introduction to delve deeper into JavaScript. However, several essential aspects require more details and more factors.
- https://www.tutorialspoint.com/javascript/index.htm This contains a comprehensive guide for learning to program JavaScript.
- https://www.codecademy.com/ This website allows you to follow their curriculum and learn JavaScript through several exercises. It’s one of the most renowned and valuable for new learners.
- https://developer.mozilla.org/es/docs/Web/JavaScript This is the leading website for documentation reference and learning the ins and outs of pure JavaScript.
- https://stackoverflow.com/ Most likely, you already came across this website. It’s one of the best places to find answers to common Programming questions.
How to get started with your first web project
To start a project, you need to establish specific questions:
- Why do you want to do this project? What drives you?
- Is this project achievable? Can this be done in the expected timeframe?
- What tools are required to accomplish this? Are there any problems that can be solved using third-party software (packages/libraries)?
Your first project should often stay small in scope and achievable over time. Thus, you can think of something portfolio-worthy, like a calculator, an image displayer, or something similar.
How to get started with your first Node.js project
To think about a NodeJS project, you need to think about something you want to do with your PC that can’t typically be done on the browser (i.e., file processing, image resizing, file encryption, scrapping, etc.).
You’ll also need to remember the previous steps on the first web project (the questions about scope and aim).
Conclusion
In this chapter, we’ve reviewed several aspects of JavaScript and implemented a couple of practical examples (which you can expand on however you want). The following chapters will include several other models and techniques to help you continue learning JavaScript.
This is an unorthodox approach in which we’ll dive straight into JavaScript development with the bare minimums, so you don’t have to install anything new on your PC. Consider this as the next step after the basic tutorials.

Other Blog Posts
.webp)
Does Your Business Need a Data Warehouse?