

Custom Events in JavaScript

What are Custom Events in JavaScript?
Custom Events in JavaScript, or synthetic events according to MDN, are events created and dispatched by the script instead of an event fired by the browser. Custom events allow you to define your event types and attach them to elements in your application which can then be triggered and listened programmatically.
What Custom Events are useful for?
Custom Events are helpful in many scenarios where you must create your event types.
Custom UI components
If you are building custom components such as dropdown menus or modals, you should define the events triggered when the component is opened, closed, or the user interacts with it.
Cross-component communication
If you have multiple components on a page that need to communicate with each other, custom events can be a helpful way to do so.
Third-party integrations
If you are integrating with a third-party library or service that requires you to trigger specific events to perform certain actions or receive data, custom events can help you to create a consistent interface between your code and the third-party code, making it easier to maintain and update over time.
Using Event constructor
You can create a new event using the Event constructor like this.

In the above snippet, we created an event by passing the event name as the first argument. This string can be the name of a built-in event like “click” or “input” or our own like “my-event”.
The second parameter (optional) is an Object with three optional properties:
The bubbles property determines whether the event should be propagated through the DOM. Setting this to true means that if the event gets dispatched in a child element, the parent element can listen to the event. This is the behavior of most native events, but it is set to false by default.
As the name implies, the cancelable property specifies if the event can be canceled by calling event.preventDefault(). By default, it is set to false, which means calling event.preventDefault() will not perform any action.
The composed property specifies whether an event should bubble across the shadow DOM to the light DOM.
By default, it is set to false; if you want an event triggered in your shadow DOM can be caught outside of it; this property needs to be set to true.
This property is only applicable if you are working with Custom Elements. If bubbles are set to false, the value of this property won’t matter because you’re explicitly telling the event not to bubble upward.
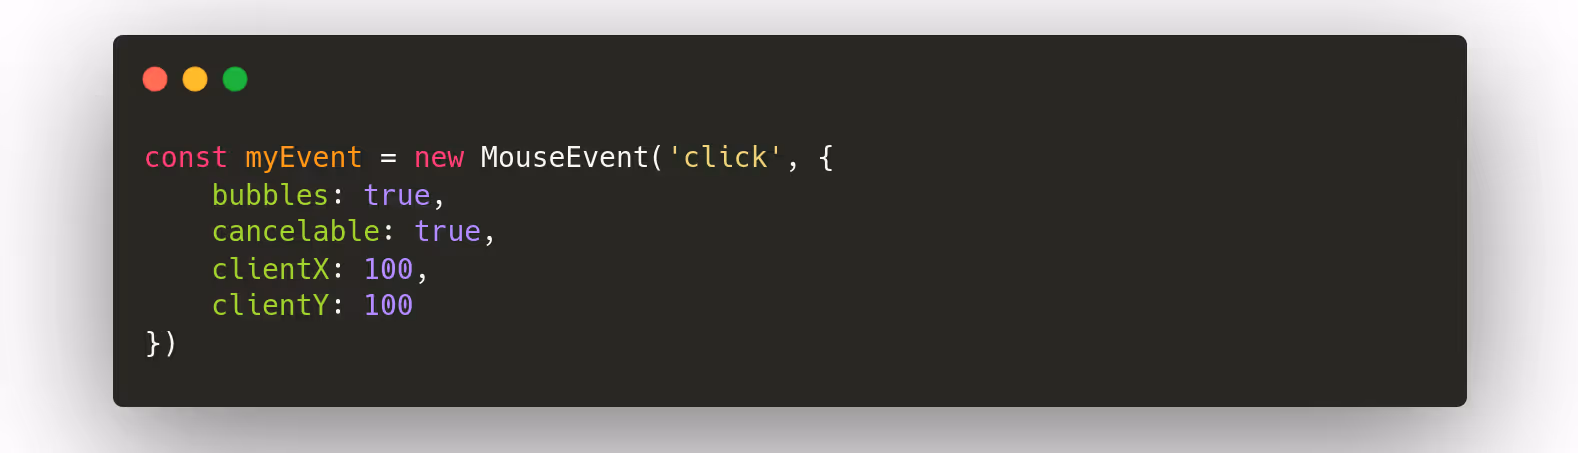
Creating native events
In addition to the Event constructor, from the UI Event specification, you can use other classes like MouseEvent, KeyboardEvent, WheelEvent, and more.
Using the right constructor allows you to specify additional properties for that type of event. For instance, you can set properties like clientX and clientY for a mouse event.
The Event constructor does not allow that; you can try this.
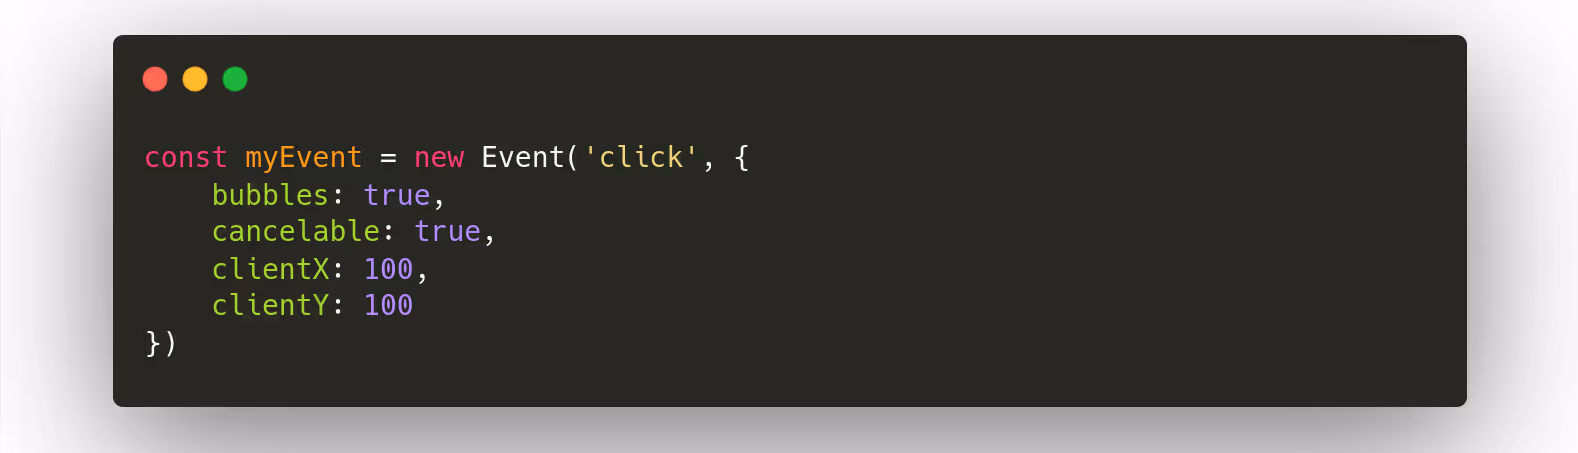
In this case, only bubbles and cancelable properties work if you log event.clientY you’ll get undefined.
Using CustomEvent constructor
Sometimes, or most of the time, you want to send data through the event to the listener. This is not possible with the normal Event constructor, which is why CustomEvent Constructor is called to action.
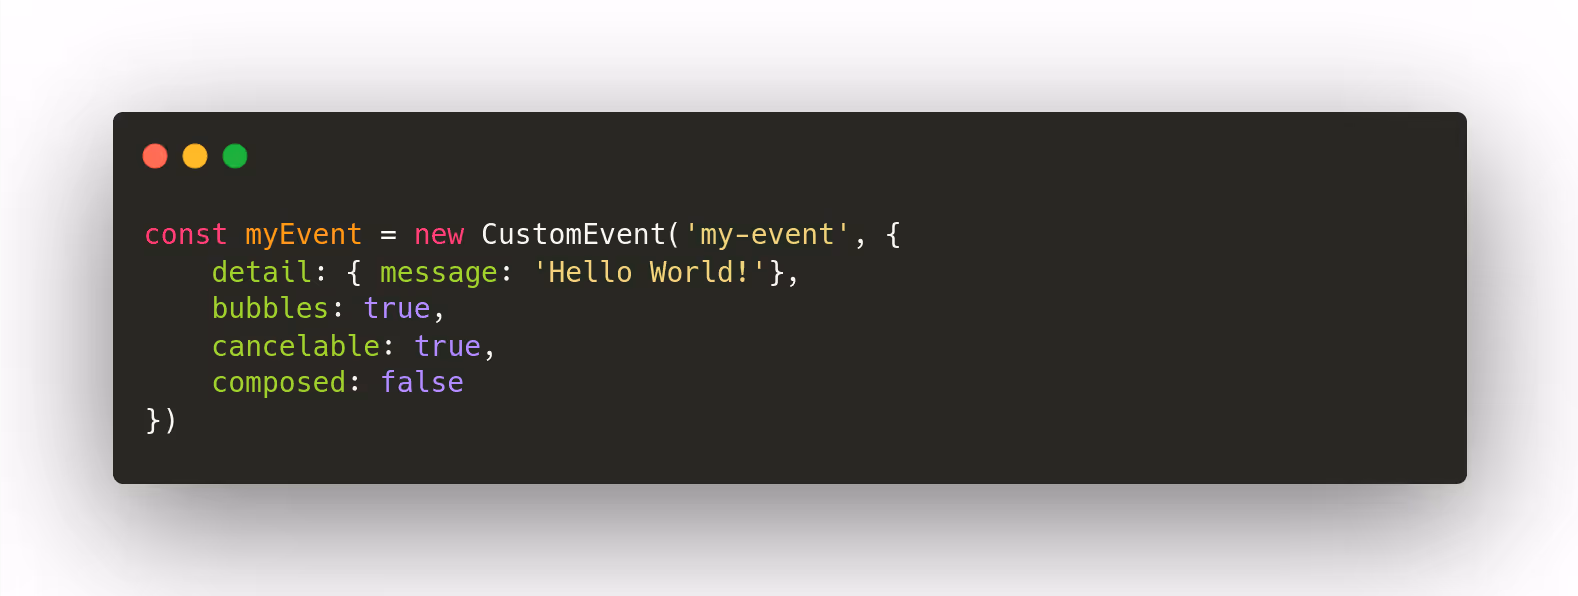
This works the same as Event constructor, but you can add a detailed property in the second argument alongside the bubbles, cancelable, and composed properties.
The detail property lets you pass whatever you want to the event listener. You can access that data on the listener callback simply by using event.detail
Dispatching Custom Events
So far, we have learned how to create a custom event, the different types of constructors, and their particularities.
How can we trigger an event created by ourselves?
For that, we need to dispatch the event. Events can be delivered to any object that extends EventTarget, including all HTML elements, the document, the window, etc.
You can dispatch a custom event so.
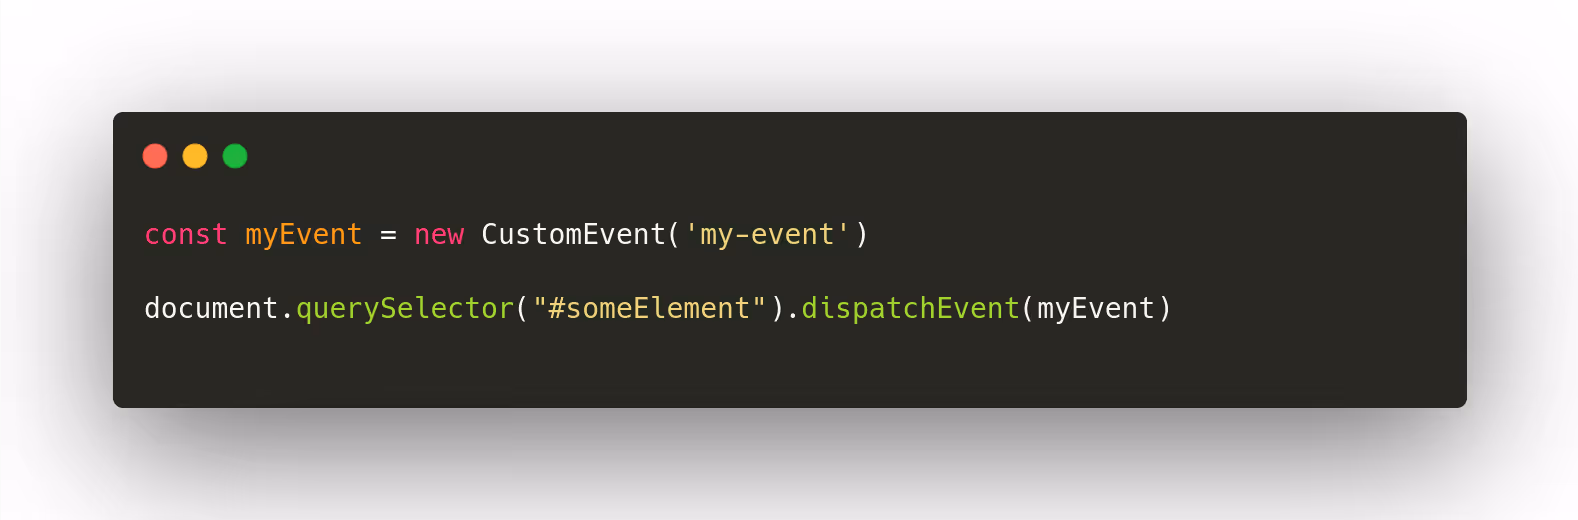
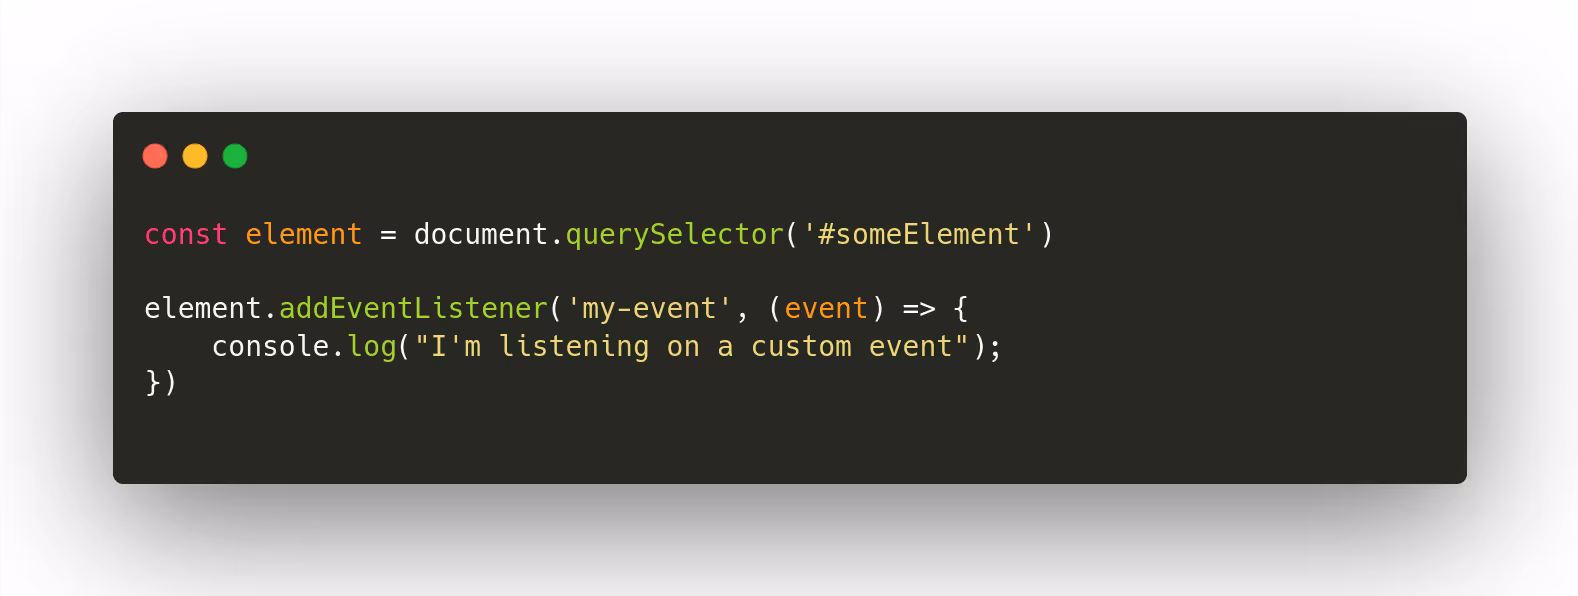
You can add an event listener to the element to listen for the custom event, just as you would with native DOM events.
Canceling Custom Events
Many browser events have a default action you can cancel using event.preventDefault(). There are no default browser actions for custom events, but you can use the preventDefault method either; in that case, the call to dispatchEvent(event) returns false, and the code that dispatched it knows it shouldn’t continue.

In the above example, you can see how preventDefault default works on Custom Events; just remember that setting a cancelable flag to true is mandatory. Without that flag, preventDefault doesn’t work.
Naming convention
You can name your custom events anything you want, but it is essential to consider following a naming convention inside your project to keep your code consistent and make it easier to work with your code.
The good idea is to pick a prefix and use it for naming all your custom events, for example, custom: or your project name.
This way, it is effortless to identify a custom event in the code, and there is no possibility of a clash with any existing built-in event nor with a new one added in the future to JavaScript.
Wrap up
Overall, custom events are a flexible and powerful tool that can be used in various scenarios. By creating your event types and triggering them programmatically, you can build more modular, reusable, and extensible code that can easily communicate and integrate with other parts of your application.
Sources:

Other Blog Posts

Swift 6 for iOS App Development: What's New and How to Migrate


Best Generative AI Tools in 2026: The Complete Guide


Nearshore software development in LATAM: The strategic advantages beyond cost
